Every weekday, Photofocus curators share a great photograph taken by one of our readers. If you haven’t submitted yours yet, be sure to do that in our Flickr group. As dedicated writers for Photofocus, we come across a lot of photographs. The photographs we choose every week have not only impressed us, but they’ve also […]
Every Sunday we highlight some of our best finds from across the web for photographers. Here are some of our most notable finds. AP photo of flag-bearing protester rockets around the world U.S. News & World Report Photographer Julio Cortez tells the story behind his photograph, which showcases a protester in Minneapolis, MN carrying an […]
“If photographers are responsible for creating or reflecting an image of women in society, then I must say, there is only one way for the future, and this is to define women as strong and independent. This should be the responsibility of photographers today: to free women, and finally everyone, from the terror of youth […]
This week, Scott Wyden Kivowitz kicked things off, giving us three photography challenges to do while we’re at home. Then, Bryan Esler had an interview with Adobe’s Sharad Mangalick, talking about the state of Lightroom. Lauri Novak told us how to create opportunity through mistakes, while Andrew Ford walked us through the benefits of monitor […]
With a lot of protests happening the last few days due to the death of George Floyd, I’ve seen a lot of photographers and videographers in the forefront of the action. As photographers, we always want to capture that once in a lifetime shot of something that we might not get to see or experience […]
It’s time to make your voice heard! Each week, we ask a question of our readers so we know what sort of content to produce more of. Your input helps us make Photofocus better. This week, we want to know what your first brand of camera was. Whether you’re a new photographer or a veteran, […]
Our very own Michèle Grenier spoke with Frederick Van Johnson about her career as an action sports photographer, as a part of the “Behind the Seen” podcast by Skylum. In the video above, Michèle talks about how she started her photography career, from assisting at weddings to building her own brand. Based in Quebec City, […]
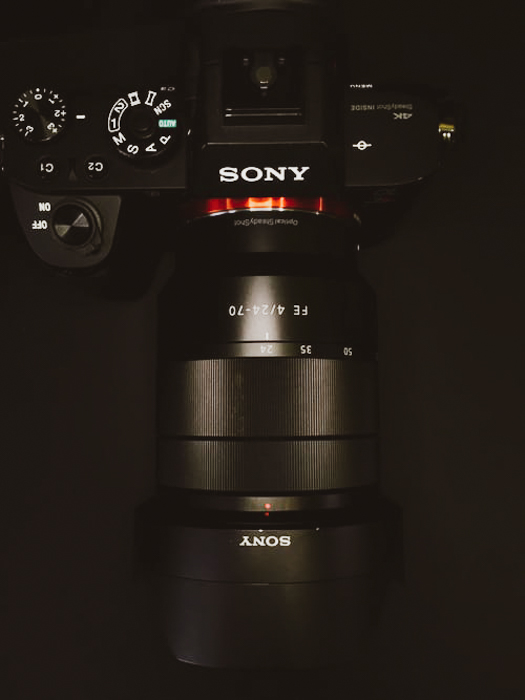
Looking for a way to photograph with fresh and new perspectives? From nature to portrait, to commercial and artistic photography, a macro lens might just be what you need. Here are my thoughts on my up-close and personal hands-on with the Sony 90mm f/2.8 macro lens. Up to this day, I’ve never really needed a […]
For the month of May we asked you to share your stay safe at home images with us. What can you create from where you are? It can be taken in your own backyard, out your window or something you create using what you have in your house. Photographer: Jinnifer Duncan Photo: “Quarantine Vibes” Loving […]
My guest is the general manager of the premiere metal printing and project management company Image Wizards, Mirza Izic. Mirza has a unique task not just managing the company but also creating educational content teaching how to get the most out of metal printing. Topics includes proper setup, proofing, black and white printing and how […]
This morning, PHOTOPLUS announced in an email to past attendees that its annual expo — slated for October 22-24, 2020 — will be taking place as scheduled. Show director Joe Kowalsky delivered the message to attendees: “Between now and October we’ll continue to take our cues from the state of New York and work hand […]
Are you one of those portrait photographers who want to get in and get out real quick when it comes to editing? Not everyone wants to spend hours cleaning up blemishes in an image. Sure, to get that perfect magazine spray-painted effect you can go all in, but in general, you capture it great in-camera […]
Over time, the colors that monitors produce can change ever so subtly. Yes, even LED monitors. It is easier to recognize on multiple monitor setups since you have a direct comparison. Whether viewing on my Apple LED monitors at my workstation or my Dell LED monitors at home (all set to the same color display […]
For the month of May we asked you to share your stay safe at home images with us. What can you create from where you are? It can be taken in your own backyard, out your window or something you create using what you have in your house. Photographer: Balaram Paul Photo: “Reflection of Jumping […]
When it comes to photographing a long exposure, it’s not just a matter of setting up your camera on a tripod and hitting the shutter button. You have to take into account several different settings, as well as your overall scene. In the video above, Serge Ramelli talks about everything you should consider before snapping […]
Has this happened to you? You go out, take some shots, look at your screen and think oh no! You either forgot to change your settings or somehow something got pushed or dialed into the wrong setting for what you’re doing and you didn’t realize it. Luckily we’re typically photographing with digital cameras when this […]
Laura Vink is a travel photographer, entrepreneur, author and photography instructor. The ‘wow’ responses to her vacation photos elicited from her friends and family prompted her to concentrate more on her photography — and with great success! Today, she inspires thousands of people through her travel photography book, articles and online photography academy. Laura wants to demonstrate […]
(Editor’s Note: We welcome Jemma Pollari to Photofocus. Jemma is a photographer on the Sunshine Coast in Australia, where she photographs in between mothering her two little boys, writing, teaching and designing. She delivers free weekly photo prompts on her blog the Promptographer Photo Prompt Guide.) When planning a lifestyle family photoshoot, I always consider the light […]
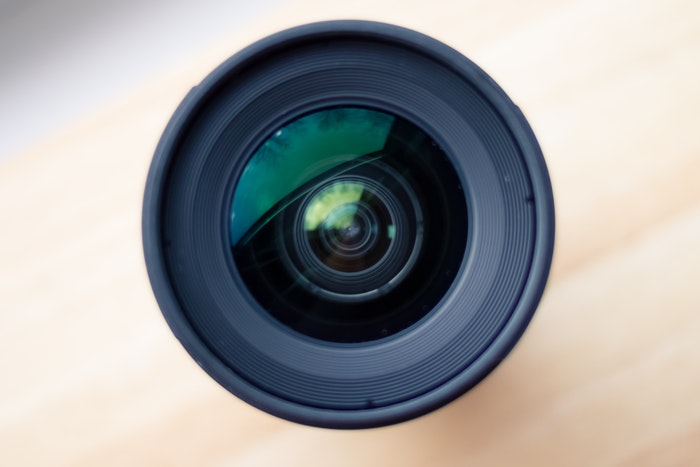
We are all familiar with the sound of a camera shutter. But do you know what happens inside your device when that happens? In this article, we’ll explain how a shutter works, and why you hear that distinct clicking sound.
What Is a Camera Shutter?
First, let’s define what a shutter is and what it does. You can think of it as a gate that opens to let the light into the sensor or film and closes to stop the exposure.
In reality, a shutter is a complicated mechanical contraption. It’s not just a simple gate that opens and closes. There are various types of shutters that work differently depending on the camera. Let’s have a look at the shutters you’ll find in DSLRs, mirrorless, video, and motion picture cameras.
How Does a Camera Shutter Work?
DSLR Shutter
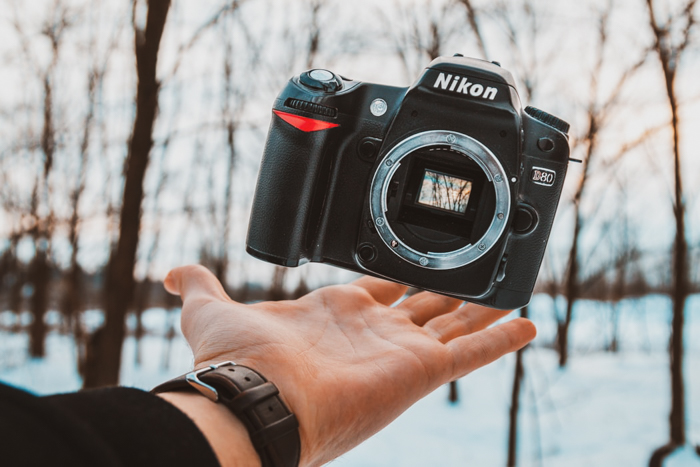
Before we start, let’s define DSLR to understand how its shutter works. The acronym stands for Digital Single Lens Reflex. That means that your camera has an optical device composed of a mirror and a prism. This lets you see exactly what goes through the lens.
The optics of the DSLR works by placing a mirror behind the lens, which goes to a prism inside your viewfinder. You can think of it as a tiny periscope that bounces light around to reach your eye.
Now, what does the mirror have to do anything with the shutter? Well, since the mirror is directly behind the lens, it prevents the light from hitting the shutter. But the DSLR is designed in such a way that when you press the shutter button, the mirror goes up so the shutter can open and make an exposure.
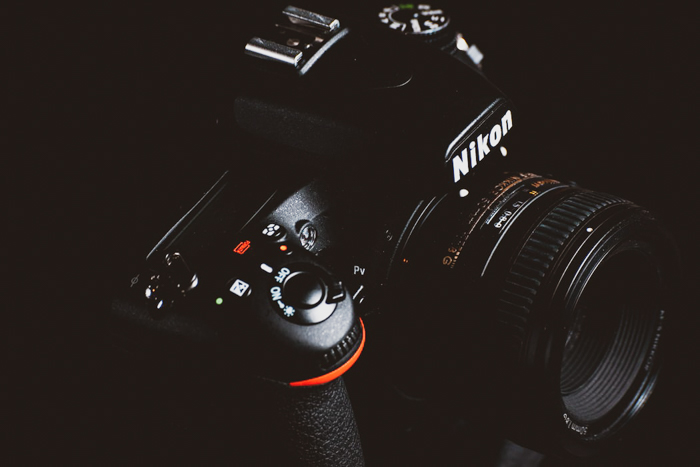
When you press the shutter button, you’ll hear the mirror make a slapping sound when it goes up. Since it’s not reflecting any light behind the lens and directing it to your viewfinder anymore, you get a black screen.
While the mirror is up, a shutter curtain goes down and exposes the sensor behind it. Once the exposure is finished, a second curtain goes down and covers the sensor. The amount of time the first curtain goes down and the second curtain goes down depends on the shutter speed. The slower the shutter speed, the longer the shutter is open.
Mirrorless Shutter
Mirrorless cameras are called such because they don’t have the mirror that DSLRs have. Mirrorless cameras transmit image data from the sensor to a small electronic screen in the viewfinder to let you see what you’re shooting.
In many ways, the shutter mechanism of a mirrorless camera works similarly to DSLRs. It also has a shutter curtain that goes up and down as you take a picture. But the difference this time is the way it moves and captures the image as you press the shutter button.
Since a mirrorless camera doesn’t have a mirror, the sensor is fully exposed behind the lens. But when you press the shutter button, a shutter door goes up to block the sensor, and then goes down to make the exposure. Once the exposure is done, another door goes down from the top of the frame.
But what about medium-format cameras? Medium-format got its name from 120mm format cameras during the film days. Since medium-format cameras have a bigger sensor and resolution, they’re very expensive. Only a small percentage of professional photographers get to use them on a daily basis.
Just like full-frame cameras, medium-format cameras also have DSLR and mirrorless versions. That means that their shutter mechanisms also vary. But the high-end medium-format options often feature a special shutter called a leaf shutter.
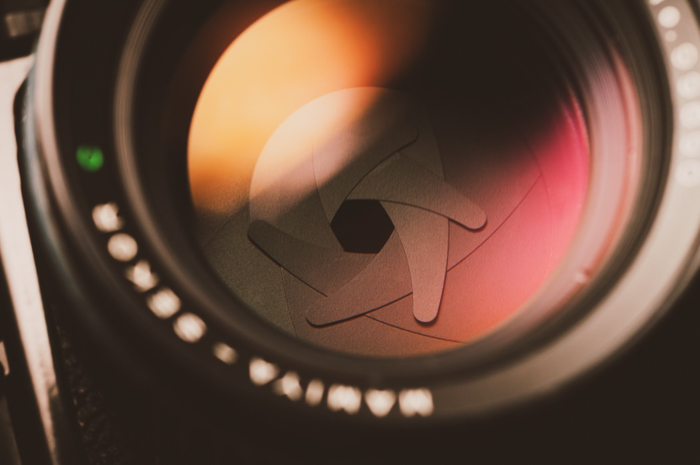
Unlike other shutter mechanisms, a leaf shutter is inside the lens and not the camera body. It also looks and works like an aperture, moving inwards or outwards instead of up and down.
The advantage of a leaf shutter is that it’s faster than any other mechanism that employs a shutter curtain. You can use it for high sync flash that can be 1/1000th of a second or more, as compared to 1/200 or 250th of second for mirrorless and DLSRs.
Compact Cameras and Smartphones
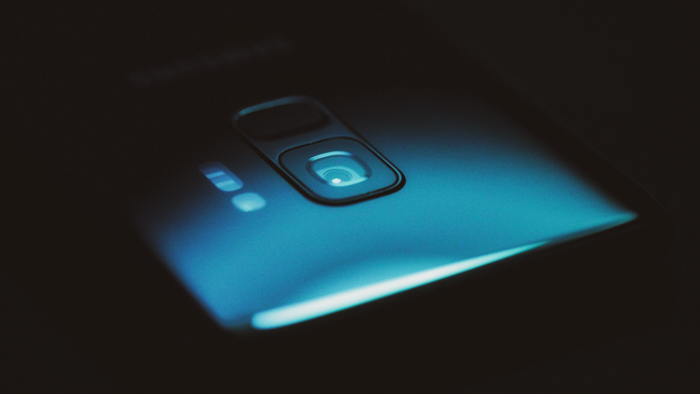
Ever wonder where the clicking from your compact camera or smartphone comes from? The truth is that sound is produced electronically.
Compact cameras and smartphones don’t have shutter curtains that go up and down at all. Instead, they capture light from the lens straight to the sensor. That’s mainly the reason why they’re smaller and can take more pictures than regular cameras.
So if your smartphone works without a shutter, then why is it still necessary for normal cameras to have one? It all comes down to the quality of the photos. Cameras without shutters tend to produce grainy pictures. On the other hand, cameras with mechanical shutters have cleaner images. They have better control of the light hitting the sensor.
Shutter Activity When Taking Pictures
As mentioned earlier, the amount of time the shutter stays open is proportional to the shutter speed you set on your camera.
As an experiment, you can adjust your shutter speed to 3 seconds and press the shutter. The time between the first click (when the shutter and mirror opens) to the second click (when the shutter and mirror closes), is the same amount of time.
But since shutters are mechanical, they can only go so fast when taking pictures. Try pressing the shutter and hold it for ten seconds and you’ll see how fast or slow your camera takes pictures.
Your camera’s shooting speed is calculated by using FPS or frames per second. Most consumer cameras can only take about 5 to 8 frames per second even when using a shutter speed of 1/8000th of second or more. While some professional models (especially mirrorless options) can shoot almost up to 24 frames per second.
Shutter Activity When Shooting Videos
Now that you know that most cameras can only shoot a few frames per second, you’ll understand why the shutter is never used when shooting video. Otherwise, you’ll end up with jerky motion because the shutter isn’t fast enough to capture natural movement.
When you record videos using your mirrorless or DSLR, your shutter goes up and never goes down until you finish shooting. In Video Mode, the sensor then becomes a “virtual” shutter by electronically scanning the light coming from the lens.
Capturing video data depends on the kinds of sensor your camera has. Ther are two main types of sensors in cameras. The first one is the CMOS which is found in most entry-level and even professional cameras. It captures video by scanning the scene from left to right, and top to bottom.
A CMOS sensor scans an entire scene in milliseconds (which is fast!). But it tends to suffer from the rolling shutter. In other words, it distorts fast movement because it can’t record a scene all at once. If you have a DSLR or a mirrorless, try swiftly panning your camera from left to right and you’ll notice that “Jell-o effect” caused by rolling shutter.
The second type of sensor is called CCD and is mostly found in high-end and professional video or cinema cameras. It uses what’s called a global shutter to avoid any distortion in movement. That means it captures a scene all at once so you’ll see no lags in any motion in your frame.
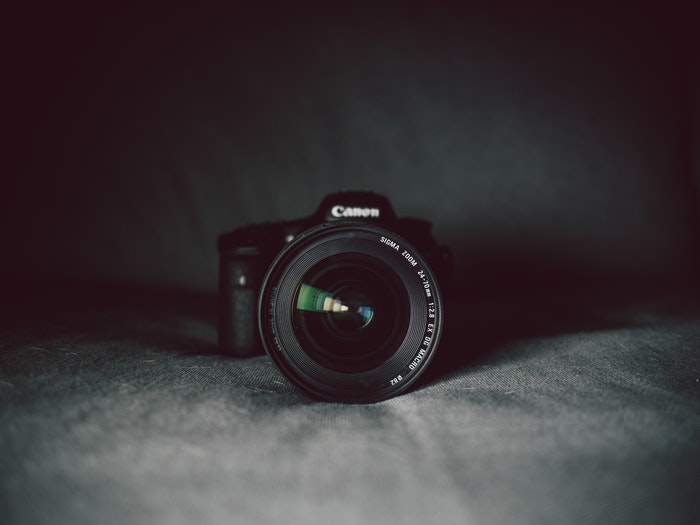
Check Your Shutter Count
Your camera shutter is mechanical, which means that it can only do so many clicks before it stops working. Your camera’s shutter life expectancy can be found in your camera’s spec sheet or online.
An average consumer camera has a rating of about 100,000 shutter actuations. Meanwhile, professional options are rated 200,000 or more actuations. It may not sound enough. But in general, most enthusiasts only reach up to 25,000 actuations a year. That means their camera can last up to 4 years.
Meanwhile, it’s not unusual for professional photographers to reach 50,000 or even 100,000 actuations per year. That’s why you often see them change their cameras all the time.
You can check your shutter count online by uploading a recent JPEG or raw picture from your camera. Remember that sometimes a shutter can break before or even way after it reaches its expected number of shutter actuations. Like your car mileage, a shutter life expectancy is a manufacturer’s estimation.
Photo by Steve Johnson from Pexels
Conclusion
It’s always a good idea to learn about how your camera works. Knowing the mechanics of your shutter, for instance, would allow you to see its capabilities and limitations. And let’s be honest: It feels good to know what’s going on inside your device when you hear that click.
pin it!
Save this article to your Pinterest profile to access it later!
Adobe Lightroom comes with default presets. However, they do not always have the ones you need. Thankfully, you can find tons of Lightroom presets online without paying for anything.
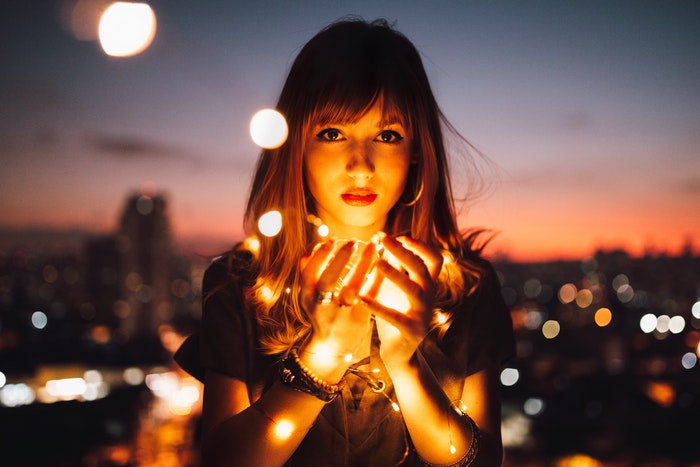
Now let’s check out the 25 best free Lightroom presets for portraits to download!
Photo by Matheus Bertelli from Pexels
[Note: ExpertPhotography is supported by readers. Product links on ExpertPhotography are referral links. If you use one of these and buy something, we make a little bit of money. Need more info?See how it all works here.]
What Is a Lightroom Preset?
Before we dive in, let’s find out what a Lightroom preset is and what you can do with it.
You can think of Lightroom presets as filters. They change the colors and other exposure settings of your image for creative effects.
Lightroom presets create a mood that further improves your portraits. Not to mention that they give your images a coherent look.
So are there free Lightroom presets? The simple is yes, and there are tons of them out there.
So what’s the catch? A lot of photographers share them to help market their name. Meanwhile, others use them to introduce you to paid versions that are better.
Most free Lightroom presets are easily downloadable. While some require you to subscribe to the creator’s website or social media channels.
Without further ado, let’s take a look at some of the best free Lightroom presets for portraits on the web!
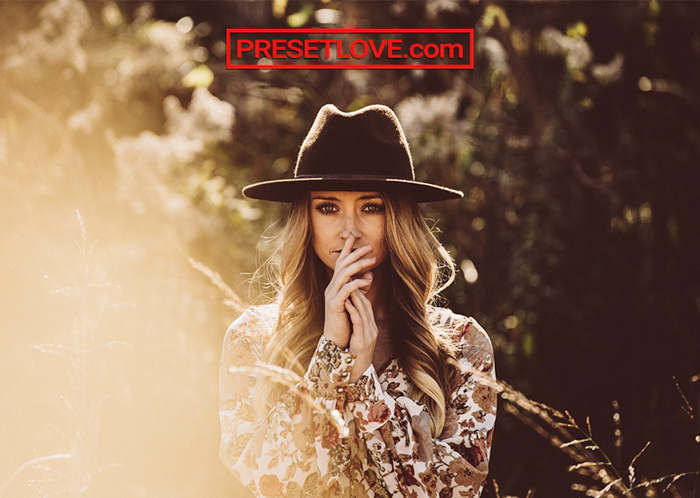
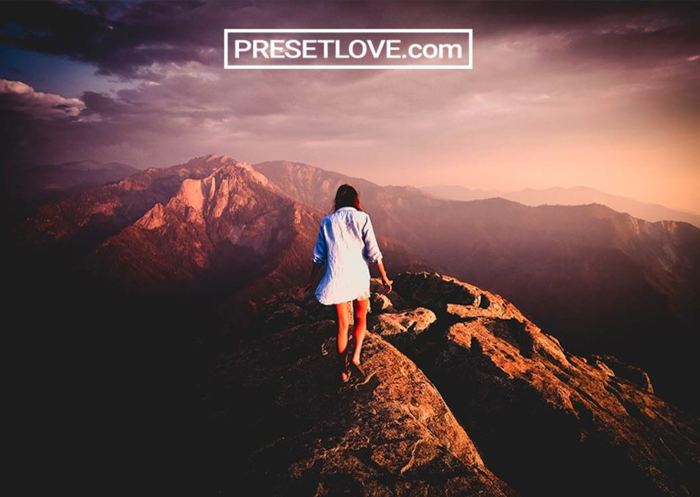
PresetLove’s Warm Cinematic is the best option for photographers who love that moody look in some movies.
Warm Cinematic deepens the shadows and creates beautiful contrasts. It also uses a warmer colour temperature to produce a sunny atmosphere in your images.
This preset is perfect for photos with bright lighting. Using it on dimly lit images may produce dark and grainy results. Furthermore, it tends to make some pictures look muddy. But thankfully, you can easily fix all these issues with a few adjustments.
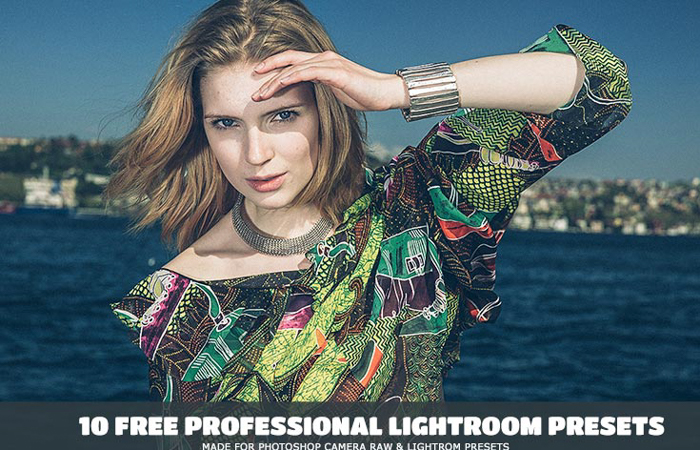
People like to use the term “professional” a lot these days to make their products seem legitimate. But more often than not, many of them fail to deliver quality results.
Thankfully, Creative Tacos really meant what they said about their 10 free professional presets. Each variation delivers quality tones and realistic effects that real professionals deserve and love.
The collection gives you a variety of choices from adding a soft look to creating realistic film effects. And each option produces vivid colors and beautiful contrasts that don’t scream “it’s a filter!”
Needless to say, this collection of free presets is definitely one of my favourites!
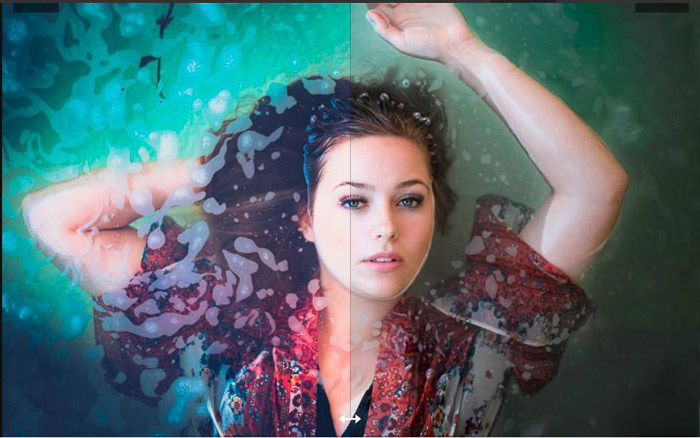
If the colours in your images always look dull, Creative Presets’ Ultra Pop needs to be in your preset collection.
Surprisingly, this collection of eye-candy presets now sell for $29 on Creative Presets’ website. But you can still get a free version at Pixelbuddha which we linked above.
Ultra Pop does a great job making the colors in your images vibrant. But at the same time, it doesn’t oversaturate your image to the point that everything looks radioactive.
You may have to tweak your contrast and other exposure levels every once in a while. But for the most part, Ultra Pop renders colors accurately.
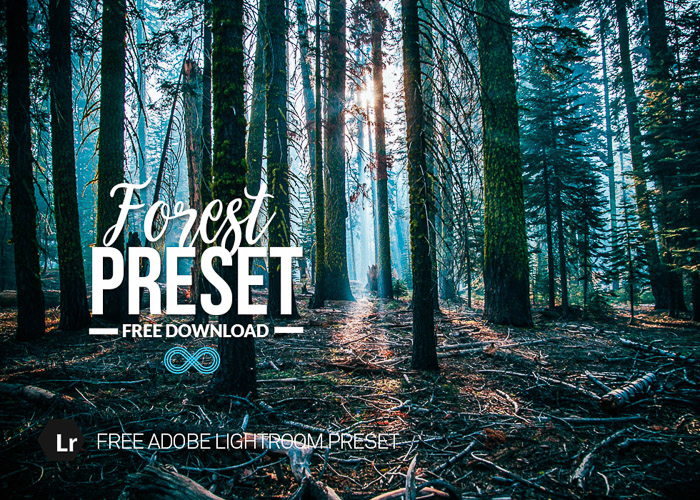
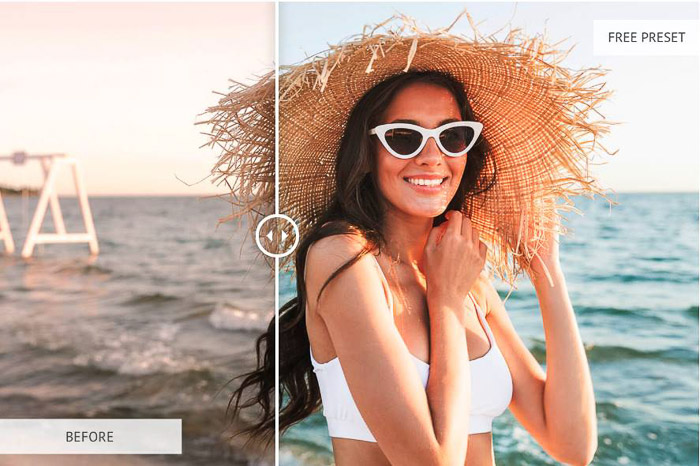
This free lightroom preset covers your photos in a beautiful, cool hazy look. We recommend to use it on portrait photos where the light is soft and warm, or neutral.
Prepare yourself for an impressive image transformation as soon as you click on this free preset.
It’s not for all types of photos, but when it works, it really works.
You can access the free preset by submitting your email address.
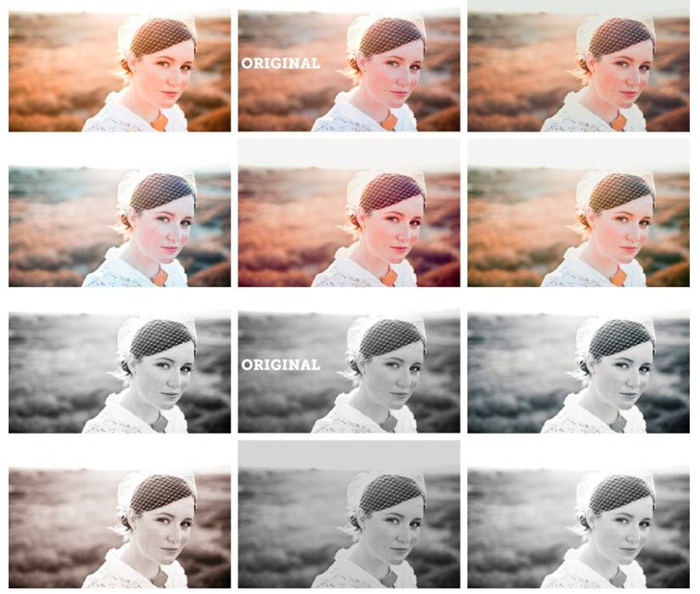
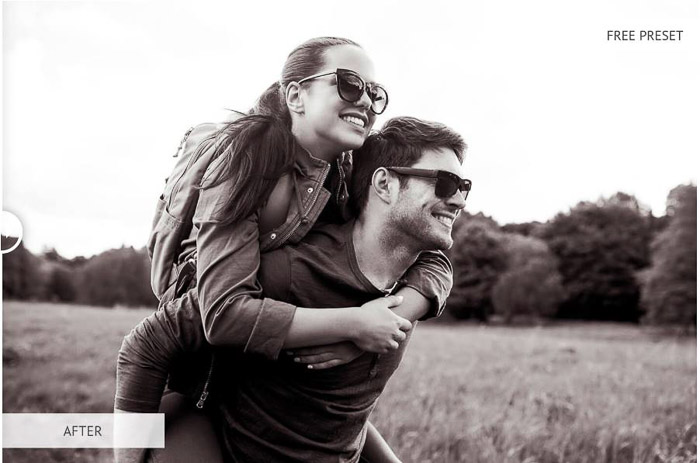
Altphotos has created a pack with 10 free Lightroom presets for portraits. Nine of them are color presets and one is White & Black.
The color presets have a variety of effects. You can use them to either warm the colors of your portraits or cool them down.
These free Lightroom presets also enhance the browns or the blues of your portraits. The result creates a subtle retro look.
A nice thing about this pack is that you can find descriptions on the website. This way, you will know beforehand which exact effect each preset will produce.
And the best part? You can download these Lightroom presets at once (no need to use your email address).
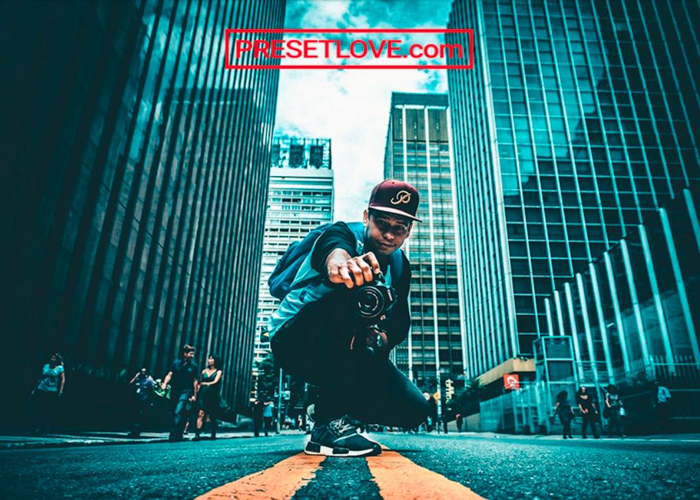
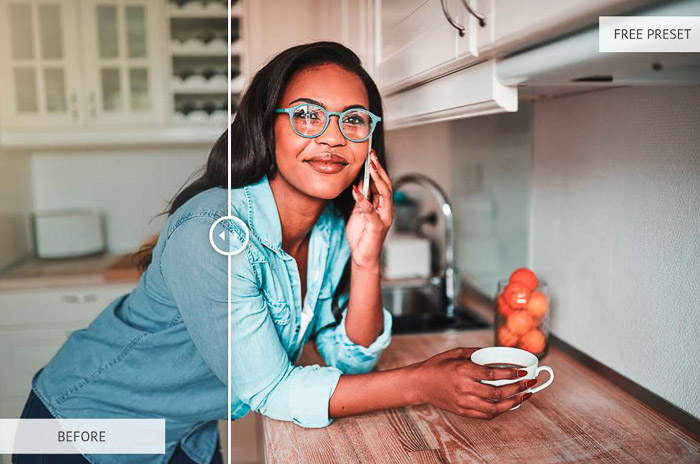
This is another one of the free lightroom presets for portraits from Presetlove. But it’s totally different from Warm Retro.
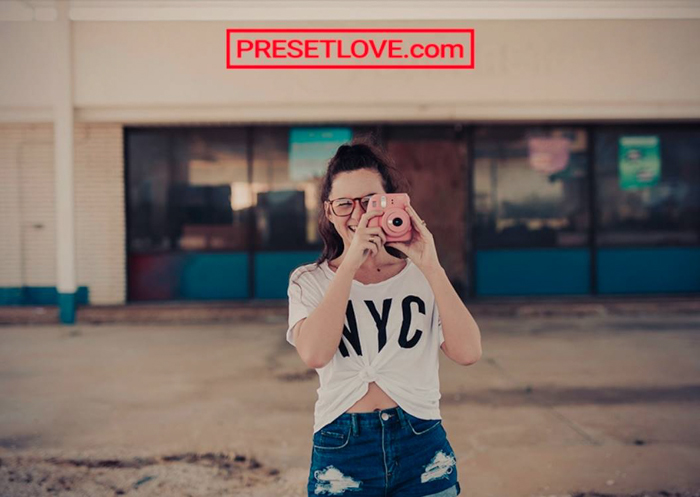
Urban Cool is perfect for urban and street portraits. It enhances the cool colors by adding greens, blues, and violets to the shadows.
To balance the cool colors, it saturates the warm tones. It also increases the clarity and sharpening, giving a pop to your photos.
The great thing about this preset is that it adds a film look to the urban backgrounds of your portraits. At the same time, the skin color remains natural.
Presetlove’s “Shadow Crusher” saturates a portrait with intense tones. This increases both the exposure and the shadows and adds a dark vignette effect. All of these adjustments result in dramatically dark photos.
The “tough and dangerous” look it creates makes it perfect for urban photos. And did we mention that it’s perfect for competitive or extreme sports photographers, too?
When you use this preset, keep in mind that it pulls the mid-tones towards the extremities (especially to the dark). Furthermore, it also creates a tint of magenta in the image.
Photos with a widespread histogram are perfect for this free lightroom preset. But you should also make sure that your photo doesn’t have too much purples and magenta.
If you want to give your portraits an 80s twist, should check out Presetlove’s “All Gold Everything” preset. This is one of the free Lightroom presets that nostalgic millenials will absolutely love.
All Gold Everything brings up the warm tones in your images and give them a yellow cast. It will make them look as if they were captured on a Kodak Gold film.
If you want to take a Stranger Things Style photo, give this free Lightroom preset a try.
PresetLove’s “Antique Bronze” preset for portraits is an awesome sepia portrait preset with a grainy effect. It adds intense tones and a subtle vignette to photos.
This is another one of those free Lightroom presets that create a beautiful old and vintage look. But it keeps and even enhances the details and sharpness of the image.
Unlike black and white monochromatic presets, this preset’s sepia tone enables the viewer to see more hues in the image. It completes the effect by increasing clarity and whites.
This free Lightroom preset works well in a variety of scenarios. It performs well in almost any scenario from nature and outdoors to urban environments.
Keep in mind that this free lightroom preset works better with intricate textures that it can emphasize.
Freelightroompresets is one of the best resources for free Lightroom presets. They offer you 39 stunning options and most of them work great for portraits.
You can even filter the Lightroom presets according to what you need them for. You can search for presets for portraits, cinematic, black & white and others.
I like most of the 39 free presets for portraits. But my favorite would have to be the Luc Besson. Its name comes from the famous French director famous for his distinct movie look.
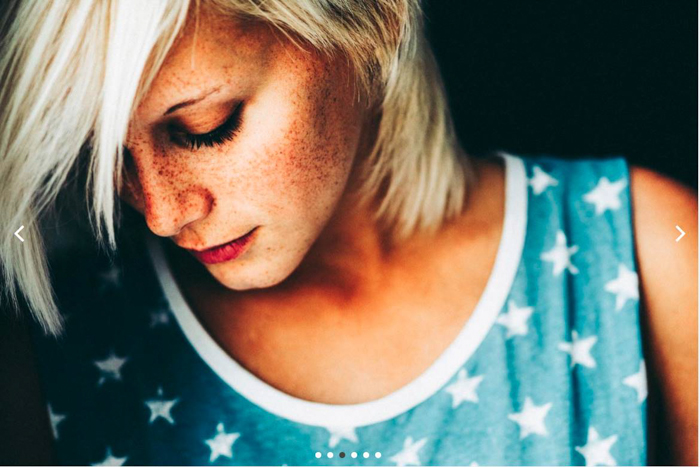
This wonderful Lightroom preset mattifies your portrait while maintaining the contrast and brightness. It also lowers the saturation of all the colors, especially greens. At the same time, it does a good job keeping the skin tones natural and flattering.
And if you’re fond of grain, this is one of the free Lightroom presets for portraits that delivers.
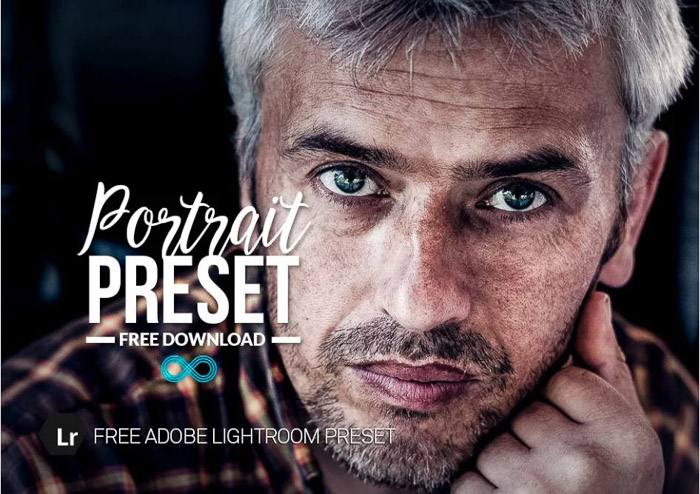
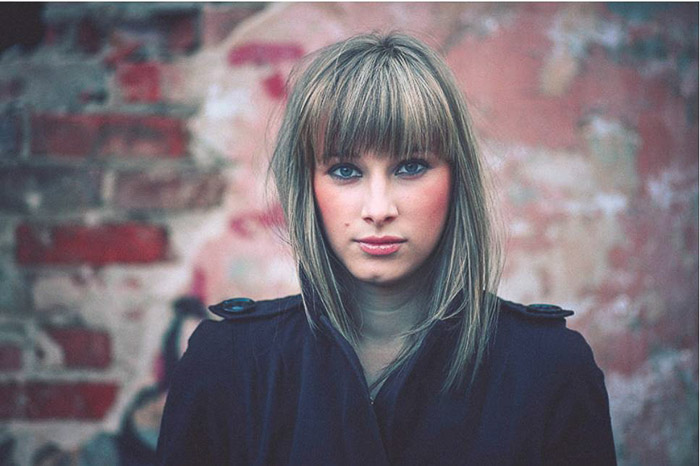
Dramatic colors and lighting is a trendy look these days. And Photonify’s Portrait Preset is one of the best free Lightroom presets for portraits you can use to achieve that edgy look.
This preset will help you to get a gritty look that works well for dark and intense portraits. For example, it is perfect for magazine covers and celebrity or street portraits.
I don’t recommend it if you want to soften the skin if your models. Because this Lightroom preset is doing precisely the opposite. It sharpens your image quite a lot as well as increases detail and contrast and emphasizes textures. In other words, this makes skin imperfections and shadows stand out more.
So if you’re looking for free Lightroom presets for newborns or beauty shoots, this may not be for you.
To get these free Lightroom presets for portraits, you need to join Photographyconcentrate‘s Super Preset’s Explorers Club. That means you need to sign up and register your email. But that’s a small price you pay for what you get from the website.
The most interesting thing is that they give you access to the Freebie Library. You can find presets packs and other resources here such as ebooks.
This pack consists of 10 Lightroom presets for portraits. It includes 5 color presets and 5 Black and White presets. They have straightforward names, so you know which effects you will achieve.
These free Lightroom presets for portraits are versatile and subtle. They work with a wide range of skin tones, giving them a natural look.
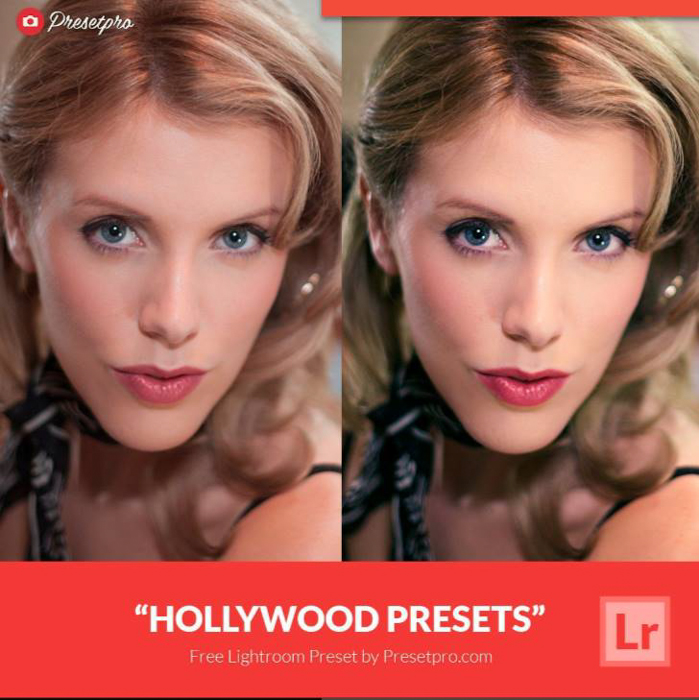
If you would like to put some glamour into your portraits, check out this collection of free Lightroom presets.
If you want to get the entire collection of presets for Lightroom, you’ll have to buy it. But at least you get 70 varieties inspired by old Hollywood movie posters.
But even if you don’t have the budget, you still get to try two free Lightroom presets for portraits. You don’t even need to give them your email address or subscribe to their site.
These two presets affect portrait colors. With the Technicolor preset you can get a nice, soft, warm look. It has an orange-yellow tint in the highlights and blue in the shadows.
The Stage preset is more dramatic. It lowers the vibrance of all the colors to zero. It works well for indoor portraits with artificial lighting. Keep in mind that it also turns the blues to purples.
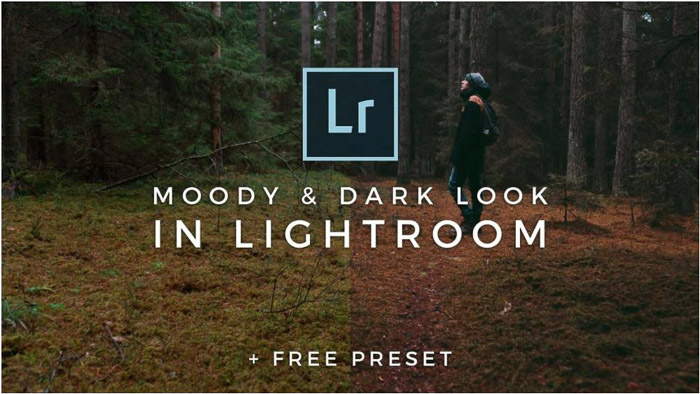
Signatureedits.com is one of the best sources for free Lightroom presets for portraits. The great thing about it is that it comes with a tutorial that explains exactly how it was created. The tutorial is helpful if you want to adapt the preset to your own style.
The Moody Lightroom Preset adds a bit of contrast to your portrait while having a dark faded mood. Beware that it creates a cooler look in images. On one side, it warms both yellows and the greens. But it also desaturates the pictures.
As the last step, this preset adds an orange coloring to the whole image using the calibration panel. This really contributes to the dark mood. The preset works great if you want to give your photos an autumn or winter feel.
As the author says, it might not work with all your portraits, but it will give you a nice start.
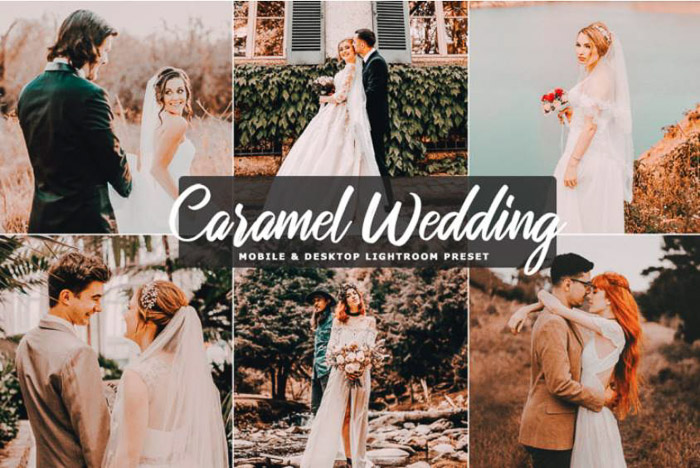
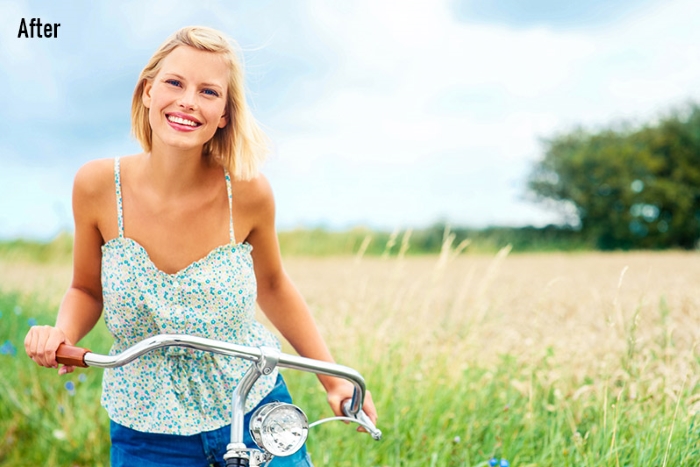
Creativetacos is a website that offers you a lot of well designed free Lightroom presets for portraits. One of my favourites is the Sunset Desert.
As the name suggests, this preset adds a beautiful warm glow to photos. It’s perfect for portraits shot when the sun is low on the horizon, during the golden hours. You will see the natural warm colors pop while keeping the skin tone natural.
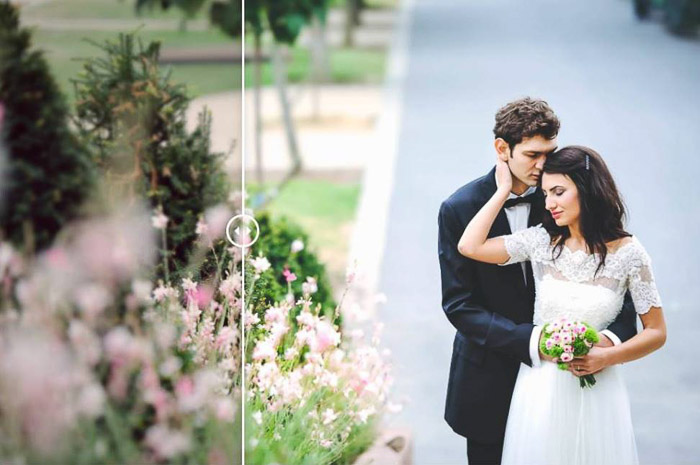
Sunset Desert is one of the most versatile presets for Lightroom out there. You can use it in wedding photos, travel photos, urban photography, and many more. And did I tell you that it’s also suitable for Mobile Lightroom,
This preset is different from other free Lightroom presets for portraits and weddings. It adds brightness to photos while increasing the contrast a bit.
This preset also enhances the whites, making them pop. This is usually nice for wedding photos, at least if the bride is wearing a white dress.
The free Lightroom preset creates a slight matte effect. As a result. it gives portraits a bit of mood, but without exaggerating it.
The only problem I found with this preset is that it might change some colors quite a lot. You’ll notice it especially with the blues.
Think ahead if these color changes are relevant or not before applying the preset. You don’t want to change the color of some family member’s suit or dress!
Chicpreset’s “Elegant Wedding” is one of those free Lightroom presets for portraits that improve bland wedding photos. It keeps a classic look that will make your snapshot look timeless.
Elegant Wedding brightens up your photos, enhances the contrast and vibrance, and sharpens the details. This free Lightroom preset is perfect for photos taken on cloudy and grey days if you want to give them a bit of extra light.
What makes this preset especially useful for weddings is that it keeps the original colors of photos. You don’t need to worry about making changes to the clothes of the wedding guests or the flower decorations.
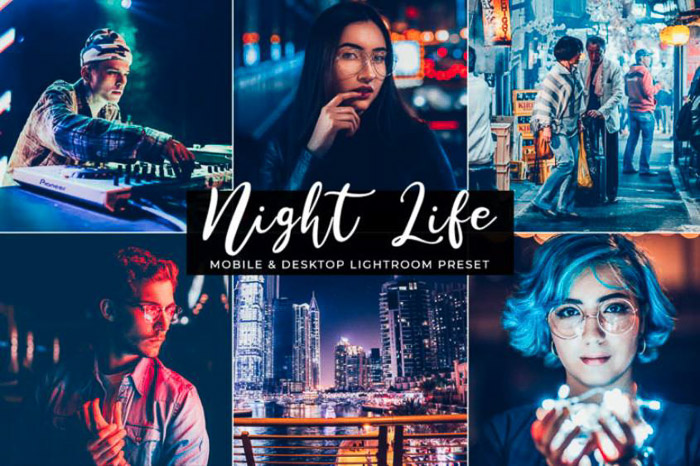
If you are a night portrait photographer, you are going to love this free LIghtroom preset by Creativetacos. It is perfect for nightclubs, concerts, and street photos. You can also use it for your wedding photography for the party photos.
This preset enhances night lights, making them pop. It increases contrast in photos and modifies the colors to emphasize blues and warm colors. It also recovers details from both the highlights and shadows.
If you are starting out with night photography, this is one of the best presets for you. It gives you a starting point where you can experiment with the colors of your portraits and night shots.
If you want to give your photos a nostalgic, vintage effect, you should check out the Grainy Matte preset. As the name suggests, it increases the grain (noise) in your images. But it also creates a washed effect that you usually see in old photos.
As with all presets, you might need to make adjustments to fit your portrait and taste. But this little free preset gives you a good starting point.
This is one of those vibrant presets that make your photos pop. Its specialty is livening up photos taken on a cloudy day or in bad lighting conditions.
This free Lightroom preset is excellent for nature and urban portraits. You can create an impressive effect if you convert the image to black and white. And then combine the free preset with a mask to have only one item in color.
Keep in mind that this preset also decreases the luminescence of blue and aqua colors. It might not be the best choice for seaside photography.
If you like Black & White photography, Fix the Photo has 10 great free Lightroom presets for you. This bundle covers a lot of the needs of a portrait photographer.
Both the Soft and Soft skin presets will make the skin of your subjects look softer. The second preset in the bundle even applies a skin color correction.
You will also find presets to soften your portraits, adding an elegant pinkish tone or a matte effect. Others add drama, create an HDR effect or enhance photos taken in harsh light.
You even have Lightroom presets for elegant and artistic effects, such as the Chocolate or the Old Film.
If you want to try the orange and teal look, then the Amber preset is for you. As you can expect, it uses contrasting oranges and blues together with high exposure and sharpness. These help you to give more life to your portraits.
This preset works for portraits as well. But you may have to do a few adjustments to get the skin tones accurately.
Common Questions
How Do I Download Lightroom Presets?
When you find a preset you like online, download it onto a folder on your computer. If the file is zipped, unzip it.
Open Adobe Lightroom and find the Presets panel under the Develop Module. Click “+”, and then click “Import Preset”. Navigate to the folder where you saved the downloaded presets and press “Import”. Once that is done, the downloaded presets will appear in the Preset panel, ready to be used!
How Do I Download Lightroom Presets for Free?
There are many sources online that offer free Lightroom presets. Search for ‘free Lightroom presets’. Then, follow the steps above to download them.
Can I Apply a Single Preset on All of my Images?
Technically you can. But some presets work better than others in certain areas. For instance, some options may be better for portraits, while others perform well with landscapes.
You may have to use a variety of presets to achieve the best possible results. If you want a coherent look, you may need to get preset bundles. That way you have better options for different types of images.
Can I use my Presets on Lightroom Mobile?
Yes! All you have to do is sync your Lightroom desktop with Lightroom Mobile. If the process went smoothly, you should see the new preset in the collection.
Conclusion
Presets are a great tool to make your editing workflow quicker. You can use them as a base for editing your portraits and adapt them to your photos and personal style.
These 25 best free Lightroom presets for portraits will suit almost any portrait scenario. For most of them, all you need to do is offer your email address, and you get access to amazing free Lightroom presets for portraits.